Pre-Dive Equipment Check for Scuba Divers
Safety and preparedness are the most important factors to having a great scuba diving experience. Before diving, check your scuba gear and equipment properly; the process can be broken down into three phases.
Three Phases of Pre-Dive Equipment Check:
- Prepare Equipment
- Assemble Your Gear
- Check Your Diving Buddy
These phases should be completed with care and taken seriously in order to discover equipment issues and avoid potentially dangerous situations underwater. Even though these procedures seem simple or common sense, they help keep you and your diving buddy safe.
Phase 1: Prepare Your Equipment
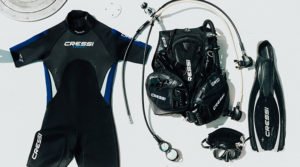
The first step to preparing for a scuba dive is to ensure all your equipment is ready for you to safely use underwater. Inspect your scuba gear and equipment for any potential issues and thoroughly do so, especially if you haven’t used it in a while. Below is a quick list of different pre-dive equipment checks you should complete before diving.
Exposure Suit
- Fit and operation. Do the zippers work properly?
- No tears or damage to the suit that cause unwanted exposure
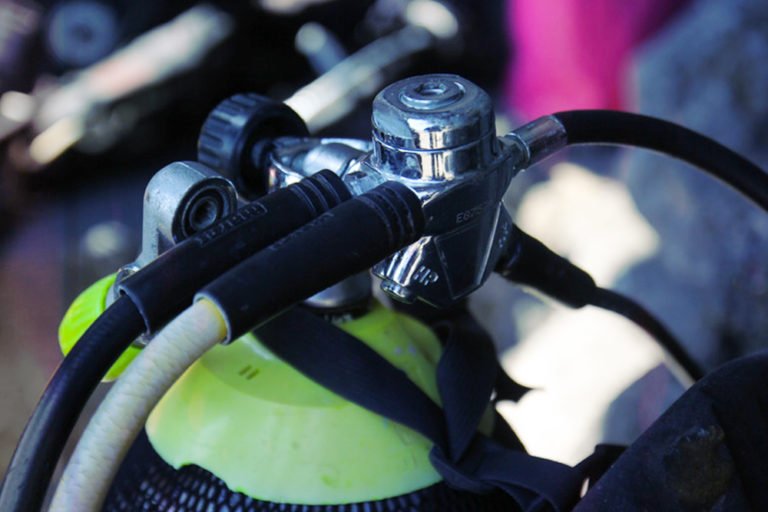
Gauges and Regulator
- Bite tabs are in good condition
- O-rings and hoses are in good condition
- Condition, operation and security of the gauges
- Inlet screen is clear, clean and the proper color
- Check the breathing operation of all second stages
Buoyancy Gear
- Integrity of the bladder
- Operation of D-rings, releases and clips
- Check security of all connections and the operation of inflator
- Verify operation and security of the relief valve with overpressure
Weight System
- Determine correct weight needed for the dive and conditions
- Check condition of belt/harness stitching
- Ensure releases function properly
Mask, Snorkel and Fins
- Check for mask skirt damage
- Integrity and condition of all straps
- Examine the snorkel’s condition and bite tabs
Diving Accessories
- Test function of any accessories and ensure no damages before using

Phase 2: Assemble Your Gear
If you are an experienced diver, assembling your gear may become second-nature to you. However, properly assembling gear is an important step in preparation and is a basic skill that should be executed carefully before each dive.
The following gives you a simple breakdown of the steps you should take when assembling scuba diving gear.
1. Attach Your BCD (Buoyancy Control Device) to Your Tank
- Wet the BC straps and slide them over the tank. The top of the BC should be even with the tank valve
- Tighten the BC straps to secure to the tank
- Check that it’s fastened by lifting the tank by the BC shoulder straps
2. Assemble the Regulator First Stage to the Tank Valve
- Remove the cover to the tank valve
- Unscrew the regulator first stage knob and remove the dust cover
- With the second stage and octopus on the right side of the BCD, attach the first stage to the tank. Make sure the console is on the left
- Attach your inflator hose to your BC’s intake valve
3. Turn Air On
- Turn your gauges down and away from you
- Use your other hand to open the tank valve slowly
- Completely open the tank valve and turn it back half a turn
- Check for air pressure in the pressure gauge. Use air integrated computers and wet contacts.
4. Test the Regulator and Octopus
- Check these by pressing the purge buttons and breathing through clearly.
5. Secure Your BCD and Tank Appropriately
- Your tank should always be secure to avoid accidents and damage
- Lay the tank down with the BC on top OR if you are on a boat, you can place it in the tank rack appropriately
6. Put On Appropriate Attire
- Get dressed in your wetsuit and appropriate attire for scuba diving
7. Set-Up Weight System
- Insert appropriate weights into the belt.
- Place the belt on the floor behind you with the buckle on the left side.
- Hold each end of the belt and raise it to around your waist.
- Pass one end of the belt through the buckle and secure comfortably.
- Now the left side should have the buckle and the release will be accessible with your right hand.
- For integrated systems, please use the manufacturer’s instructions to set-up your weight system before you dive.

Phase 3: Check Your Diving Buddy
Safely preparing yourself for a dive is important, but ensuring you have a prepared diving buddy is just as important for your safety and theirs. There are many different ways you can check that your diving buddy is ready for your underwater adventure. There are three forms listed below. Going through the basic steps listed below, for any one of the three forms, will help you complete your pre-dive safety check.
PADI “BWRAF”
B (BCD)
- You will need to test the deflator and inflator of the BCD, check that the straps are lying flat and have no slack, and operate all dumps.
W (Weights)
- If your diving buddy is using a weight belt, check that it is secure and that the release can be easily operated or accessible by the diver’s right hand.
- If your diving buddy is using an integrated system, test the system for proper operation.
- Ensuring that you understand each other’s weight belt or weight system is important in case of an underwater situation or issue.
R (Releases)
- Check that your buddy’s releases are all properly secured, you know where to locate each one and you know how to operate each one.
- This can include the waistband, stomach, chest, shoulder clips and tank clip.
A (Air)
- Check to see if your diving buddy’s air valve on their tank is open. Breathe through the primary and secondary regulators. Look at the pressure gauge as you do so. The SPG should not drop while breathing. Check for any damages to hoses and place the octopus in the triangle between your diving buddy’s chin and the rib’s.
F (Final Checks)
- Use this step to complete a final check of all your buddy’s gear and their operations. Make sure everything is in the correct assembled manner and that you both have everything you need for your dive.
BSAC “BAR”
B (Buoyancy)
- Test all your buddy’s buoyancy devices and buoyancy compensator.
A (Air)
- Make sure all your buddy’s air sources are operating properly and have no damage.
R (Releases)
- Review the previous Release steps above and make sure all releases for your diving buddy are functioning properly.
NAUI “SEABAG”
S (Site)
- Check the conditions of the water and weather before you dive and even chose a dive site. Review the surroundings and characteristics like hazards, common marine life, and depths. Make sure to reschedule if needed and don’t risk your safety.
E (Emergency)
- Establish emergency procedures for diving with your buddy and make sure you know where your first aid kit is stored. Also know how to contact emergency responders.
A (Activities)
- Create a plan with your buddy and agree on the dive time, objective, navigation and depth you will be taking for your dive together.
B (Buoyancy)
- Review and check all your buddy’s weights and devices for buoyancy.
A (Air)
- Check the first stage, second stage and (SAC) Surface Air Consumption rates for both you and your diving buddy.
G (Gear and Go)
- Before diving, review and complete a final check of all your equipment and your buddy’s equipment. This helps you ensure you don’t need any other accessories or tools, such as line reels, buoys, dive torches or diving knives, before you start diving.